Install on HP DL360 G5 fails to detect hardware raid [solved]

In the following I assume you have no data worries “…So I’ve deleted all disks…” on this array as changing drivers is dangerous for data.

OK looking into this a bit more the elrepo kernel-ml used by Rockstor also has the cciss module version 3.6.26 and from http://cciss.sourceforge.net/ you may just have to add:-

cciss.cciss_allow_any=1
or a variant there of.

So as to allow the loading of the now depricated (but possibly your only option) cciss rather than hpsa which you may have just lost out on.
N.B. the above link has some kernel parameters to prioritize one driver over the other.
@suman maybe the following drive / block names complicates things:-
“The hpsa driver is a SCSI driver, while the cciss driver is a block driver. This means that logical drives which would be presented with devices nodes like “/dev/cciss/c0d0”, etc. will now be presented as “/dev/sda”, etc.”

Looking more closely at http://www8.hp.com/h20195/v2/GetPDF.aspx/c04284194.pdf your raid controller is likely to be one of:-
HP Smart Array P400i
HP Smart Array E200i
and from the above sourceforge link they may be cciss only, yet it is likely the hpsa takes priority due to overlapping support, hence not giving cciss driver a shot at it.

The hardware controller is the HP Smart Array P400i, and yes the data is not a worry it’s backed up to a little Zyxel nas I have

This is what I’ve tried and the results.

Solution: Delete ks=hd from install string
Result: graphical installer starts but no disks detected.

Solution: Add cciss.cciss_allow_any=1 to install string.
Result: installer crashes before launching graphical installer with the error “Specified non existant disk sda in ignore disk command.”

Solution: Delete ks=hd from install string and add cciss.cciss_allow_any=1
Result: graphical installer starts but no disks detected.

I’d try installing vanilla Cent OS 7. If that installs fine, it gives us a good starting point to try including an additional driver in the iso.

Update.

  1. installed EasyNAS - drives detected and can install to disk1
  2. Attempted to install vanilla CentOS 7, this fails exactly the same way as Rockstor
  3. Followed the advice in this thread https://www.centos.org/forums/viewtopic.php?f=49&t=47011
    and added hpsa.hpsa_allow_any=1 to the install string. This results (using CentOS 7 or Rockstor) in the following error
    just after the hardware detection
    "Warning : could not boot
    Warning : /dev/root does not exist"

Any ideas where to go now?.

I have taken so long in replying that you have already found some of what I am suggesting but posting anyway as I think it may still help; does the “could not boot” error come from the installer or did you get to do an install with you quoted option. Please see my now belated post that may still help:-

OK, my mistake, the install kernel is the standard CentOS 7 3.10 kernel so doesn’t have the cciss but I found a possible way you can use the hspa which is installed (version 3.4.4-1-RH1) in the default install / rescue iso image.

I agree with @suman, since Rockstor is based on Cent OS 7.
In this context others have had success installing Cent OS 7 on your “HP Smart Array P400i” by asking the newer hspa driver to adopt older cards, so the problem does seem to be shared between Rockstor and CentOS7 :-

hpsa.hpsa_allow_any=1
although from https://www.centos.org/forums/viewtopic.php?f=49&t=47011 a poster stated they needed to use:-

hpsa.hpsa_simple_mode=1 hpsa.hpsa_allow_any=1

This is worth a try given there is no cciss driver in the install / rescue iso.

From http://cciss.sourceforge.net/ "The hpsa driver has the ability to claim unknown Smart Arrays, however this is turned off by default so that it does not try to claim older controllers meant to be claimed by the cciss driver. To enable this feature of hpsa, the module parameter hpsa.hpsa_allow_any=1 can be used."
Plus if you get to see your drives during install on the hspa then your drives will appear as normal scsi drive names.

Note that any custom parameter required during install will have to be transferred to the kernel command line controlled by grub as otherwise the installed system will fail to find it’s own drives in the same way the installer failed to find them. @suman 's boot parameter suggestion allows for installing on other than sda as I understand it.

@sirhcjw has a forum post on how he modified Rockstor’s grubs supply of command line arguments to the kernel.
The centos forum link above indicates how they went about this; although you should edit /etc/default/grub instead as in @sirhcjw post.

Rockstor’s iso also has this rescue capability on boot so if you manage to find working parameter during install then you can transfer them to the installed systems /etc/default/grub via the rescue system on the iso as follows:-

Assuming you found working kernel boot options and they were eg:-
hpsa.hpsa_simple_mode=1 hpsa.hpsa_allow_any=1
and you were able to install Rockstor onto sda.
You now need to add the working kernel boot options to the installed system.
This is a bit tricky as the installed system has the alternative older and depricated cciss drivers and it may well have a stab at your controller and that doesnt’ seem like a good idea as we would be installing under one driver and drive name and then booting into another driver and different drive names so given you are in a no loss situation you might be game to just try it but I would avoid the initial boot (ie after the install) by switching the machine off when it gets to bios after the initial install. Then boot using the iso again, or just make sure it boots the iso again directly after install so that the following can be done:-

  • Troubleshooting (Enter)
  • Rescue a Rockstor system (just highlight this via cursor keys then press the TAB key to bring up the kernel parameter entry at the bottom of the screen).
  • enter your magic kernel options found during install at the end of this line (you can remove the quiet entry)
  • press Enter key once you have the additional kernel options entered
  • You should then end up with a text dialog explaining the Rescue system, select Continue.
  • OK on the next dialog explaining the chroot command (which you will need incidentally)
  • you should now be in a rescue mode shell
  • enter the previously suggested “chroot /mnt/sysimage” so that this shell becomes ‘rooted’ on the installed system
  • cat /proc/cmdline (this command should help to verify what command line options the running kernel is using)
  • nano /etc/default/grub
  • add your magic kernel options to the GRUB_CMDLINE_LINUX= but note the following:-

N.B. The installed kernel of Rockstor has both cciss and hspa so the cciss driver may well take ownership first. To use the same driver as you used during install you will also need to tell the installed kernel’s cciss driver to allow hpsa by adding yet another parameter to your freshly installed systems /etc/default/grub files GRUB_CMDLINE_LINUX= line:-

cciss.cciss_allow_hpsa=1

  • so in your case I think the line may well end up something like (I removed the quiet so we get more boot info) should be all on one line though.

GRUB_CMDLINE_LINUX="crashkernel=auto rhgb cciss.cciss_allow_hpsa=1 hpsa.hpsa_simple_mode=1 hpsa.hpsa_allow_any=1 "

  • Save the file using the on-screen instructions of nano (Ctrl+O) and exit (Ctrl+X)
  • reassert grub using it’s new configuration on the installed system by running “grub2-mkconfig -o /boot/grub2/grub.cfg”
  • sync (because I’m old)
  • exit (will exit your chroot environment)
  • exit (will pop you into a reboot and out of the rescue system but this time hopefully you can boot the installed system)

Hope this helps.

2 Likes

Thought I’d attempt this in the morning rather that when I came in from the pub last night
and everything has worked up to the line “nano /etc/default/grub” here it says “nano not found"
and I think it might be quicker for someone to advise how I get this installed to proceed.
Please dont ask me to use vi I still have bad dreams about that app :wink:
Tried” yum install nano" and it says "Could not resolve host: mirrorlist.centos.org; Unknown error"
I’m guessing I need a wget line
I haven’t used linux since Windows 7 was launched so I’m a bit rusty with it.
Update: tried “wget http://www.nano-editor.org/dist/v2.2/RPMS/nano-2.2.6-1x86_64.rpm” and it says “wget not found” sigh
Cannot install wget error "cannot find a valid baseurl for repo: base/x86_64

Are yes, I’ve dropped the ball again. No nano in CentOS rescue disk @suman maybe we could have nano in our iso and installed by default in Rockstor installs.

@Bearbonez Well done getting this far and funny you should say about vi (it’s really not that bad after a few years :smile:) ; so it looks like bar my mistakes we are getting somewhere. If we get this sorted then it can serve as a guide to others on the same hardware which would be great so thanks for being the guinea pig.
I thought I’d tested on the actual rescue image and fresh install but seems I had installed nano on my install and suggested on the strength of that. Problem with installing nano is we also have to setup the yum system and internet etc and we are also chrooted which complicates things. So although you might not like it there is the following stream editor option instead of nano or vi:-

sed -i ‘s/quiet/cciss.cciss_allow_hpsa=1 hpsa.hpsa_simple_mode=1 hpsa.hpsa_allow_any=1/g’ /etc/default/grub

Note that is all on one line and the quotes used are the upright variant ie NOT the lean back type “`” my UK keyboard has it on the @ key.

This command searches for “quiet” and replaces it with what comes next between the next 2 “/” chars and does this in the file /etc/default/grub. So it does an in-line (the -i) edit of the file specified. When executed it will seem like it hasn’t done anything but see the below cat command to check what it’s done.

I am assuming with this command you’re successful kernel options during install were “hpsa.hpsa_simple_mode=1 hpsa.hpsa_allow_any=1” and so I have just added the previously recommended “cciss.cciss_allow_hpsa=1” to the front of them to keep the cciss driver out of it so the hpsa driver can take control.

See how you get on with that, but type carefully and to check that sed has done it’s magic you can do:-

cat /etc/default/grub

Directly after you ran the sed command. This will just dump out (concatenate to terminal) the specified file so you can see if there are any obvious mistakes, if there are then vi which is actually vim these days is your friend; no really it is.

Ball over to you.

WooHoo that worked :slight_smile:

Many thanks for your all your help and patience, I’ll be donating come payday.
I’ve been messing with various NAS installs since I was given this server to play with and had settled on Openmediavault until I came across this article Bitrot and atomic COWs

this made btrfs the clear filesystem to have but the bit that made this the must have option was what it says on page three, that you can start an array with one drive and later add a drive and convert to mirrored without data loss and at a later date add more drives and convert to raid 5 without data loss. Does this work? and has anybody tried it?
It might be an idea to link to that article on your homepage :wink:
Once agin many thanks Bearbonez

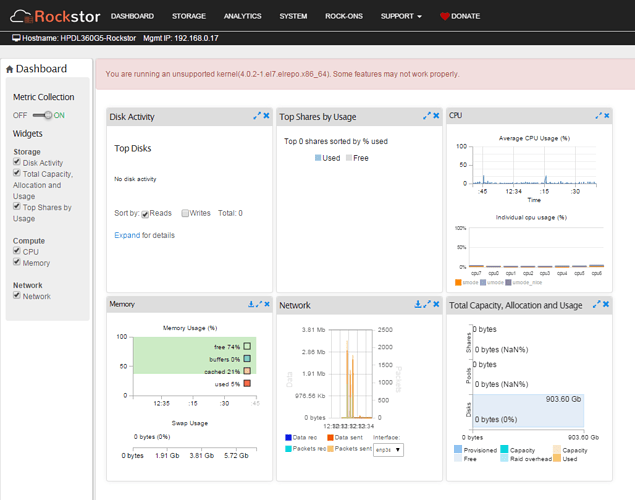
@Bearbonez That’s great, I’m chuffed. Well done for persevering. Note the red message though, its because the update has upgraded the kernel. A reboot should allow the new kernel to assert itself, it should then be 4.1. I believe this message has already been updated to state this in the future. Best to not have any red warnings showing prior to setting up pools etc.
@suman on the btrfs stuff as I’m way behind in that area. The changing raid levels is pretty fancy, though you have to rebalance for it to take effect I believe. On disk checksumming is definitely the way to go; at least something knows what the filesystem is meant to look like then.
Thanks for the link, again more @suman on this one.

Ok changed the bootloader to boot the 4…0.1-1 kernel and get the message
"The system does not have an ip address.
Rockstor cannot be configured using the web-ui without an ip address.
Login as root and configure your network to proceed further."
seems odd that an update would do this, how to fix or should this be a seperate forum post?

@Bearbonez My we are having a bumpy time.
You should be on 4.1.0-1.el7.elrepo.x86_64 kernel and it should have been the default on the subsequent reboot after the initial update. Try another reboot and confirm that this is what you are actually booting / running ie not 3.10.
There is a small chance that your network driver (in the kernel) was OK in 4.0.2 but not in 4.1. Let us know once you have confirmed 4.1 is running.
uname -a
in a terminal will show what kernel is live.

That model seems to have 2 Ethernet ports, there is a chance that 4.1 kernel has chosen the one without a cable in as the first and 4.0.2 got them the other way round. Also worth checking.

The update did not select the new kernal as default on reboot it booted the earlier one by default.
Having selected the new kernel (on the server monitor end) it then selects the new one on reboot. So it’s selecting the last one used.
uname -a result now "4.1.0-1.17.elrepo.x86_64 #1 SMP Mon Jun 22 09;04:15 EDT 2015 x86_64 x86_64 x86_64 GNU/linux"
Swapped the network cable to the other nic and still get the same “no ip” error tho

By way of narrowing it down could you reboot and select the prior 4.0.2 kernel with the previously working Ethernet cable arrangement to see if that works again. Don’t make any pools for now though as btrfs tools and kernel will be out of kilter.
Also in the network working arrangement (if it reappears of course) could you give us the “ifconfig -v -a” output and the same when it isn’t working, don’t bother with the lo: entry though.
Bit of a nuisance I know but difficult to narrow it down otherwise.
We will need a copy of your /var/log/messages, that way we can look to see what happened when the network didn’t startup. You can send a copy attached to an email to support@rockstor.com referencing this forum thread as I don’t see an attachment facility here.

I am not familiar with the bios setting on this machine but you could try disabling one of the ports and use just the other one.

If all of this is too much messing around then you could just stick to the 4.0.2 for now by re-installing and not running the update as we will be moving to 4.2 after a while anyway and that might not have this network problem for you.
Or disable all internal ports and use an add-in card as if 4.0.2 works and 4.1 doesn’t then its kernel related and another card may just get you sorted and allow you to upgrade which is best as there have been loads of fixes of late.

Tried a few things you suggested and seemed to get nowhere so took the option of reinstalling as per the instructions above and although it seems a better install (kernel is now 4.0.2 and booting by default) with no error messages on the dashboard.
However when I go in to the Storage screen and click to wipe any of the discs in the array I get this error

and Rockstor cannot use them until they have been wiped.

I realize that I am joining the party late, but first off, thank you @phillxnet for really helpful and enlightening content.

Even with the current strange behavior with switching default boot kernels(which is resolved and shouldn’t happen in future updates), there is no need for any bootloader config changes. Whenever rockstor boots, it sets 4.1(provided you are running 3.8-2) as the default kernel. So you may need to reboot a couple of times, but it should just boot into 4.1 by doing nothing besides rebooting a couple of times.

I won’t comment on the ip address as you seemed to have fixed it already, sorry for my late responses.

Thanks suman, any idea on the problem above? not being able to wipe the disks in the array

Sorry you ran into this after an enduring effort, but lose no hope over it, we’ll help you. This looks like a real bug to me. Could you please follow the instructions in that error and email the logs? Feel free to attach them here if that is more convenient. If it’s a simple fix, I’ll get it out in the next week’s update.